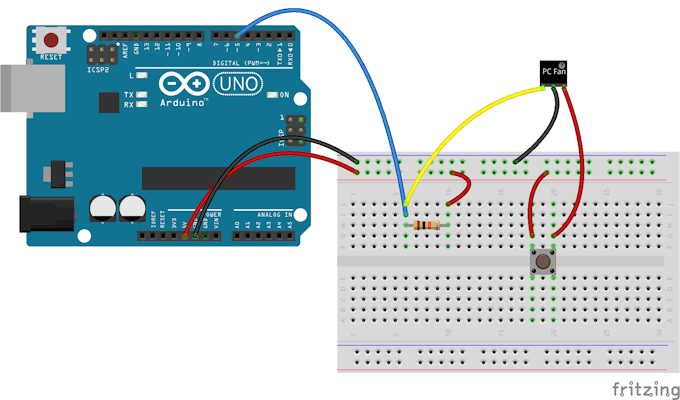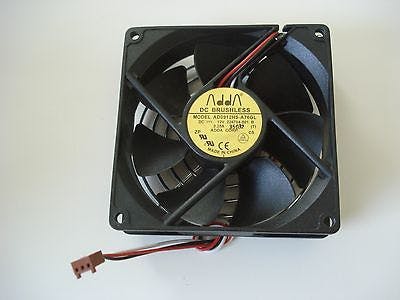
In this project, a 3 wire PC fan is used. The third wire comes from a Hall Effect sensor that measures the fan speed.

As the fan rotates, the Hall Effect sensor produces pulses.
The results are sent to the serial monitor.
Here is the code that does the job:
#include#include "FanMonitor.h" // *** // *** Pins // *** #define FAN_MONITOR_PIN 5 // *** // *** Define the FanMonitor instance to monitor // *** the 3-wire fan. // *** FanMonitor _fanMonitor = FanMonitor(FAN_MONITOR_PIN, FAN_TYPE_BIPOLE); void setup() { // *** // *** Initialize the serial port. // *** Serial.begin(115200); // *** // *** Initialize the fan monitor. // *** _fanMonitor.begin(); } void loop() { // *** // *** Get the fan speed. // *** uint16_t rpm = _fanMonitor.getSpeed(); // *** // *** Print the speed to the serial port. // *** Serial.print("Speed = "); Serial.print(rpm); Serial.println(" RPM"); // *** // *** Delay 1 second. // *** delay(1000); }
I thought of something a little bit different.
I've managed to make a PC Fan wind Turbine by removing the PC Hall Effect sensor and electronic commutator IC and connecting the terminals to the Fan winding.
You can find more details about it here.

By making this connection, I've turned the PC Fan into a small wind turbine that produced about 3-6 Volts in fair wind speed.


The output voltage can light an LED. And it can also be used as an indication for wind speed.

By connecting the output of the modified PC Fan to Arduino Analog Input, we can get an indication for wind speed.
Using Arduino in this project makes monitoring and calibration process very simple and straight forward.
More photos, code and results will be available soon.
Thank you for reading.
Check my books on Amazon

![Embedded Systems, Electronics: My Projects Collection From Instructables by [Ebeed, Ahmed]](https://images-na.ssl-images-amazon.com/images/I/51TB2XHdvSL.jpg)
![PC Fan Wind Turbine: How to turn an old PC Fan into a small wind turbine the easy way by [Ebeed, Ahmed]](https://images-na.ssl-images-amazon.com/images/I/51cjinFtMYL.jpg)

No comments:
Post a Comment
Your feedback is important to me. Thank you for commenting.