

This article is a real treasure to anyone who wants to get started with ESP8266 and doesn't know where to start from.
What I liked the most about this article and what makes it so special
- The author also clarifies the difference between ESP32 as the newer ESP module and the ESP8266 WIFI Module with basic function.
- Another thing I liked about the article is a new trial the author has made and succeeded in doing it. This trial is by accessing ESP8266 WiFi Module directly but using Arduino UNO as a bridge. I've seen many other programmers and makers who used USB-to-TTL converters and made the task of configuring the module seem so hard. But this author has clarified the steps making it so simple and straightforward.
- Another useful thing I've learned from this article is ThingSpeak. The IoT website that you can use to connect your application and then analyze your data using Matlab tools and all for free.

So let's get started.
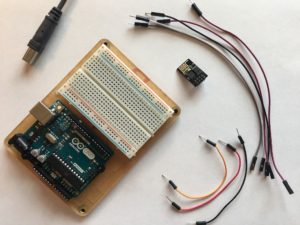
Testing the ESP8266 Directly
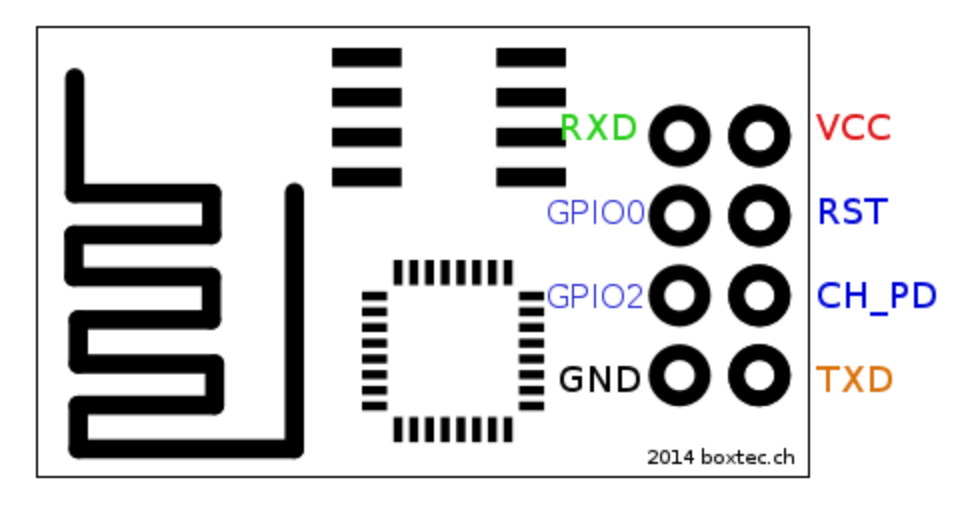
Esp8266 | Arduino
-----------------
     RX | RX
     TX | TX
    GND | GND
    VCC | 5v
  CH_PD | 5v
 GPIO 0 | None
 GPIO 2 | None
Arduino | Arduino
-----------------
  Reset | GND
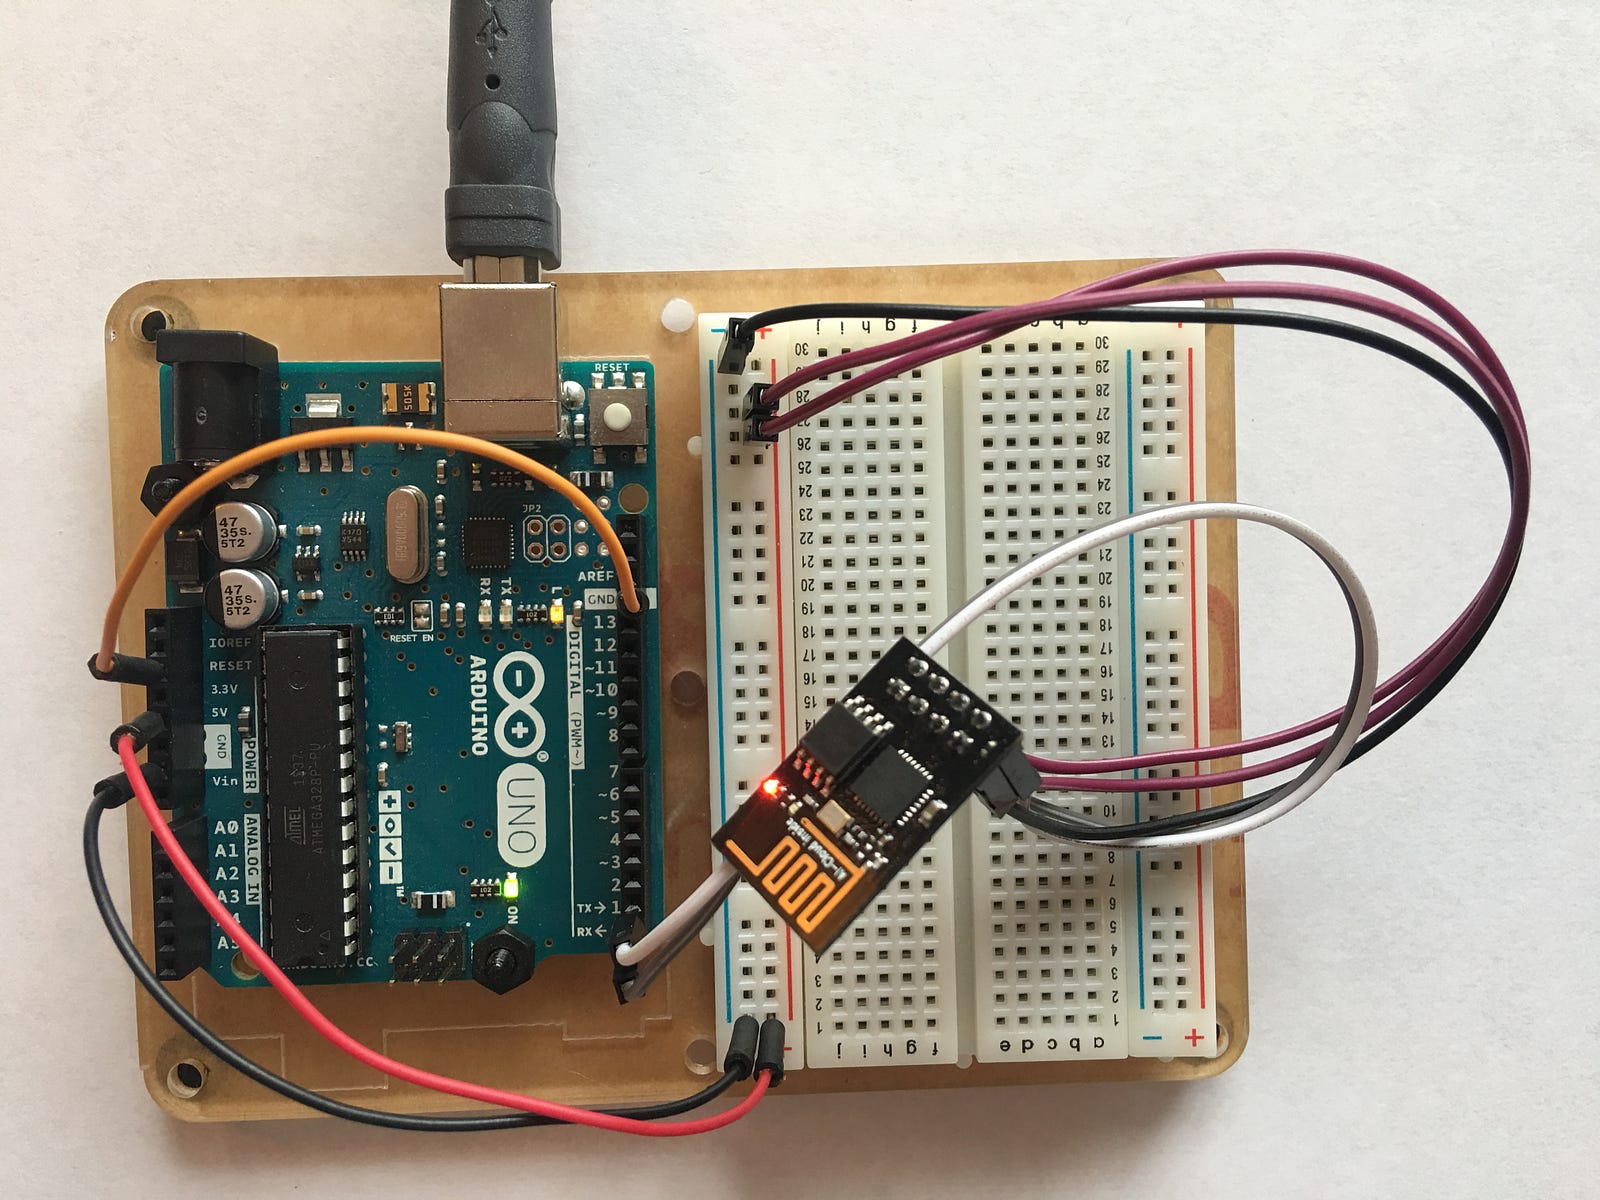
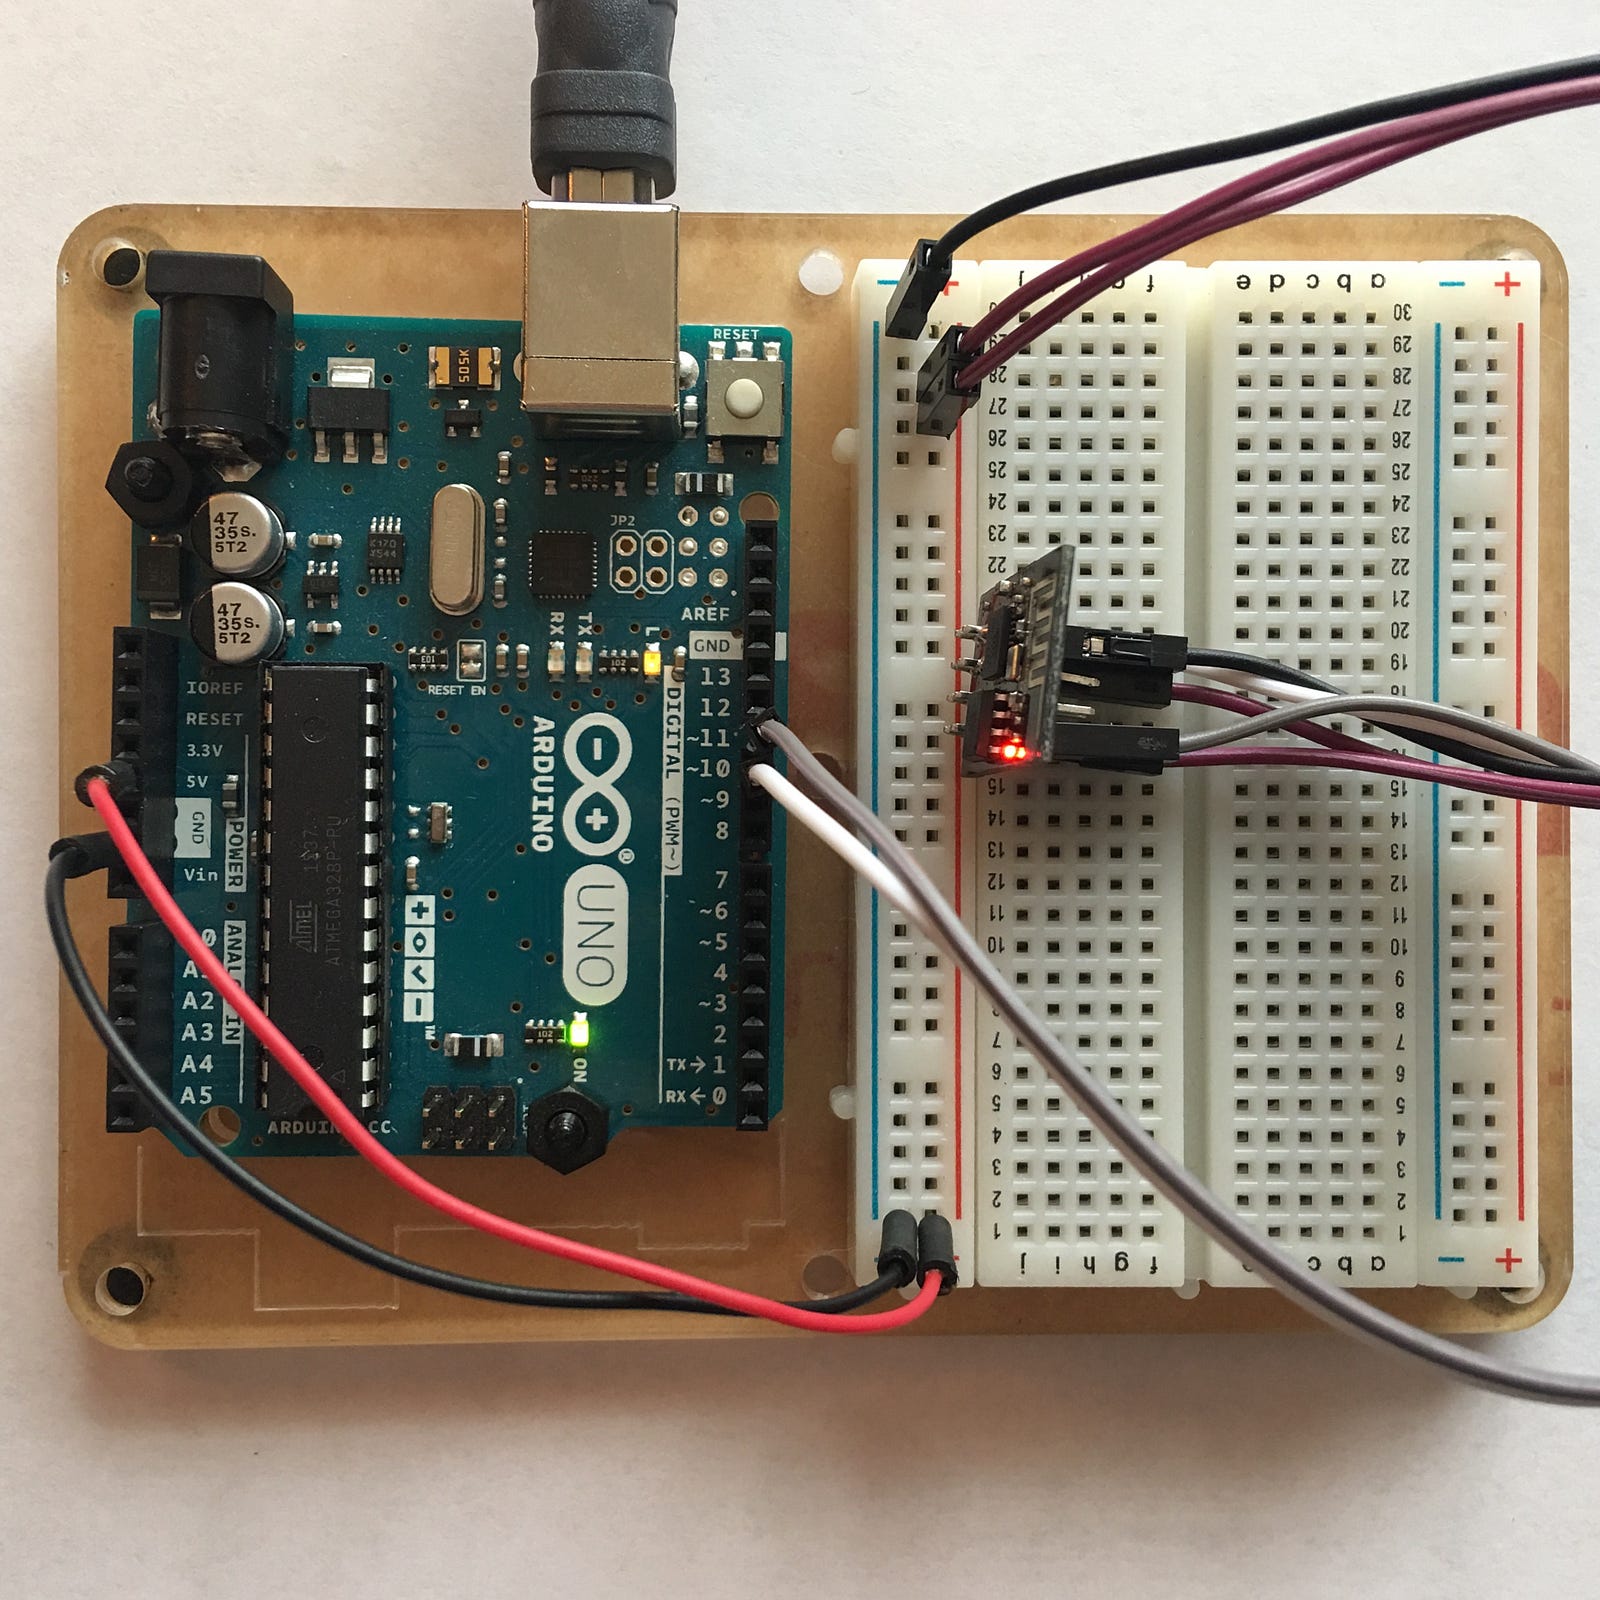
Accessing ESP8266 from Arduino Uno code
Esp8266 | Arduino
 — — — — — — — — -
     RX | 11
     TX | 10
    GND | GND (same)
    VCC | 5v (same)
  CH_PD | 5v (same)
 GPIO 0 | None (same)
 GPIO 2 | None (same)
Code
#include
#define RX 10
#define TX 11
String AP = "WIFI_NAME";       // CHANGE ME
String PASS = "WIFI_PASSWORD"; // CHANGE ME
String API = "YOUR_API_KEY";   // CHANGE ME
String HOST = "api.thingspeak.com";
String PORT = "80";
String field = "field1";
int countTrueCommand;
int countTimeCommand;
boolean found = false;
int valSensor = 1;
SoftwareSerial esp8266(RX,TX);


void setup() {
  Serial.begin(9600);
  esp8266.begin(115200);
  sendCommand("AT",5,"OK");
  sendCommand("AT+CWMODE=1",5,"OK");
  sendCommand("AT+CWJAP=\""+ AP +"\",\""+ PASS +"\"",20,"OK");
}
void loop() {
 valSensor = getSensorData();
 String getData = "GET /update?api_key="+ API +"&"+ field +"="+String(valSensor);
sendCommand("AT+CIPMUX=1",5,"OK");
 sendCommand("AT+CIPSTART=0,\"TCP\",\""+ HOST +"\","+ PORT,15,"OK");
 sendCommand("AT+CIPSEND=0," +String(getData.length()+4),4,">");
 esp8266.println(getData);delay(1500);countTrueCommand++;
 sendCommand("AT+CIPCLOSE=0",5,"OK");
}
int getSensorData(){
  return random(1000); // Replace with
}
void sendCommand(String command, int maxTime, char readReplay[]) {
  Serial.print(countTrueCommand);
  Serial.print(". at command => ");
  Serial.print(command);
  Serial.print(" ");
  while(countTimeCommand < (maxTime*1))
  {
    esp8266.println(command);//at+cipsend
    if(esp8266.find(readReplay))//ok
    {
      found = true;
      break;
    }

    countTimeCommand++;
  }

  if(found == true)
  {
    Serial.println("OYI");
    countTrueCommand++;
    countTimeCommand = 0;
  }

  if(found == false)
  {
    Serial.println("Fail");
    countTrueCommand = 0;
    countTimeCommand = 0;
  }

  found = false;
 }
Source : Medium
Check our books on Amazon:

Learn By Making: Embedded Systems Tutorial for Students and Beginners

No comments:
Post a Comment