Mturk Jobs

Mturk Jobs
Mturk Jobs

Tank

Wednesday, March 14, 2018

Analog Input with Arduino for beginners

What is Arduino Analog Input?

Analog signals are those signals having values without any restrictions (for example: 1.5 Volts, -5.06 Volts or 2.3 Volts)

Most signals in nature are Analog. That is audio signals are analog, temperature values are analog, speed of a motor is analog.

We need to read analog signals in Arduino to know their exact values to let Arduino take action about it.

For example, if you have a circuit to control temperature in a room, you must be able to read this room temperature to control it.

Also, if you are building a water level controller in a water tank you need to read water level in the tank.

And so on.

In the early days of electronics and Microcontrollers, designers had to put extra ICs called A/D converters (Analog to Digital Converters). That's because Microcontrollers only understand and process digital signals.


But in these days, Microcontrollers come with built in A/D converter which makes design more efficient in code and power usage.

Arduino also comes with internal A/D converters so it can read analog signals with no extra hardware. All you need is writing code(or calling the ready written libraries) for analog input.


Example Circuit:


This circuit is simply built with Arduino connected to potentiometer to make a variable voltage input(Analog Input) to Arduino.


When Arduino detects a change in analog input, it changes the rate at which the built in LED at pin 13 blinks.


 Arduino


 Arduino


This is the code that runs it:

/*
  Analog Input

  Demonstrates analog input by reading an analog sensor on analog pin 0 and
  turning on and off a light emitting diode(LED) connected to digital pin 13.
  The amount of time the LED will be on and off depends on the value obtained
  by analogRead().

  The circuit:
  - potentiometer
    center pin of the potentiometer to the analog input 0
    one side pin (either one) to ground
    the other side pin to +5V
  - LED
    anode (long leg) attached to digital output 13
    cathode (short leg) attached to ground

  - Note: because most Arduinos have a built-in LED attached to pin 13 on the
    board, the LED is optional.

  created by David Cuartielles
  modified 30 Aug 2011
  By Tom Igoe

  This example code is in the public domain.

  http://www.arduino.cc/en/Tutorial/AnalogInput
*/


int sensorPin = A0;    // select the input pin for the potentiometer
int ledPin = 13;      // select the pin for the LED
int sensorValue = 0;  // variable to store the value coming from the sensor

void setup() {
  // declare the ledPin as an OUTPUT:
  pinMode(ledPin, OUTPUT);
}

void loop() {
  // read the value from the sensor:
  sensorValue = analogRead(sensorPin);
  // turn the ledPin on
  digitalWrite(ledPin, HIGH);
  // stop the program for milliseconds:
  delay(sensorValue);
  // turn the ledPin off:
  digitalWrite(ledPin, LOW);
  // stop the program for for milliseconds:
  delay(sensorValue);
}


Paid Online Surveys
Check our books on Amazon we created on our way to find happiness.
A Trip To Siwa Oasis: Tourist guide to an Egyptian Oasis by [ElSakhawy, Sara M.]

A Trip To Siwa Oasis

The Ultimate travel bag list by [ Elskhawy, Sara M.]

Monday, March 12, 2018

Digital Input for Arduino

What is Arduino Digital Input?


Digital input to Arduino is the simplest and most direct form of input. 

The digital pin can be either High or Low. Which can mean in logic Zero or One.

This input can be the state of push button, input voltage in binary form or you may use analog input to Arduino digital inputs as a way of quantization.


In real life you can use it to sense the logic state of a button (ON/OFF Switch or Push Button) to check its position.


You can also use it to sense the presence of voltage as an input to Arduino form another circuit.

Use of relays can be considered as a digital input to Arduino.


From Arduino Website:


digitalRead()

[Digital I/O]

Description

Reads the value from a specified digital pin, either HIGH or LOW.

Syntax

digitalRead(pin)

Parameters

pin: the number of the digital pin you want to read

Returns

HIGH or LOW

Example Code

Sets pin 13 to the same value as pin 7, declared as an input.
int ledPin = 13;   // LED connected to digital pin 13
int inPin = 7;     // pushbutton connected to digital pin 7
int val = 0;       // variable to store the read value

void setup()
{
  pinMode(ledPin, OUTPUT);      // sets the digital pin 13 as output
  pinMode(inPin, INPUT);        // sets the digital pin 7 as input
}

void loop()
{
  val = digitalRead(inPin);     // read the input pin
  digitalWrite(ledPin, val);    // sets the LED to the button's value
}


Arduino 


Paid Online Surveys
Check our books on Amazon we created on our way to find happiness.
A Trip To Siwa Oasis: Tourist guide to an Egyptian Oasis by [ElSakhawy, Sara M.]

A Trip To Siwa Oasis

The Ultimate travel bag list by [ Elskhawy, Sara M.]

Sunday, March 11, 2018

What is Arduino?

Arduino is the easiest and most supported open system for creating electronic smart devices for both professionals and amateurs.


Arduino is modular

Arduino is modular and you can build your system from scratch by integrating blocks of software (libraries) and hardware (shields).

Arduino is open

Arduino is an open system so you may build your own software by writing code for all hardware you use or start by copying ready built libraries written by others and available for free.

Hardware is also open so all Arduino shields’ schematics and designs are available and you can buy them as hardware circuits or build your own if you are comfortable with electronic circuits assembling process.

Arduino is a tool for creativity

You can make your own everything. You can make a functioning cell phone, smart home systems, electric bike controllers or even laboratory equipment.

Using Arduino makes creativity easy for you by freeing your time from electronic system design while you focus on other parts of the system.

Your imagination is your only limit.


Arduino was first built as a platform for making embedded systems design easy based on Atmel microcontrollers.

Then it evolved to make then software platform compatible with many other microcontroller and microprocessor families.

Ease and publicity of Arduino has encouraged many companies to make Arduino platform compatibles kits based on their chips. For example, Microchip ChipKit.

Arduino clones platforms have been created to comply with software written for original Arduino systems. For example, Pinguino.


Paid Online Surveys

Check our books on Amazon we created on our way to find happiness.


A Trip To Siwa Oasis: Tourist guide to an Egyptian Oasis by [ElSakhawy, Sara M.]


A Trip To Siwa Oasis


The Ultimate travel bag list by [ Elskhawy, Sara M.]


Friday, December 22, 2017

Arduino Avionics


Today I searched for the existence of Arduino in the world of Aviation and guess what I have found..

I found many websites and projects that take opensource aviation seriously.


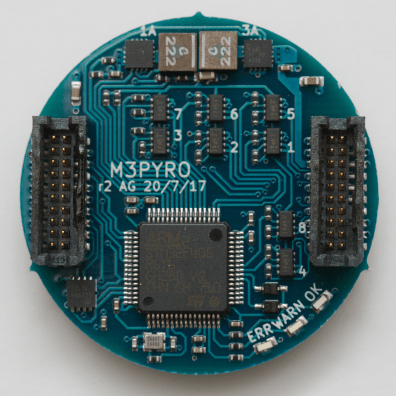
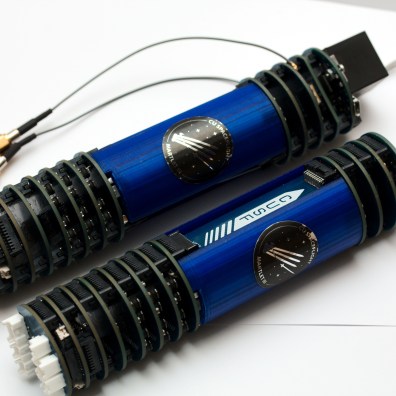
Here is a Cambridge postgraduate student who helped design a modular opensource rocket avionics system that consists of modular Disc-Shaped PCB stacks.
Screen Shot 2017-08-20 at 1.08.32 PM

custom-avionics-adam-greig-martlet-thumb


https://hackaday.com/2017/08/21/open-source-modular-rocket-avionics-package/


And this is a website for a project that aims to make general aviation safely available for everyone.

http://makerplane.org/


Open Source Magneto Signal Stabilizer


This website makes it easy for Arduino enthusiasts and hobbyists to make their own Avionics systems using the DIY culture.


http://experimentalavionics.com


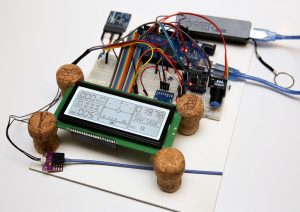
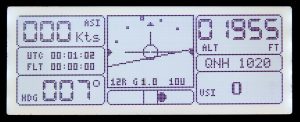
Arduino EFIS 

http://experimentalavionics.com/efis-19264/


EFIS prototype board


EFIS screenshot


Thursday, December 14, 2017

OBDuino Arduino Trip Computer

This is an open source car trip computer based on the popular Arduino platform.

It calculates trip information such as fuel consumption, cost, remaining fuel, miles per gallon, miles per tank and also displays OBD parameters.

OBDuino.ca

It first started as of 2008 based on the MPGuino project to get an open source platform for hobbyists to connect to the OBD standard.


Thank you for reading.

Check my books on Amazon


Embedded Systems, Electronics: My Projects Collection From Instructables by [Ebeed, Ahmed]


PC Fan Wind Turbine: How to turn an old PC Fan into a small wind turbine the easy way by [Ebeed, Ahmed]


Saturday, December 9, 2017

Arduino speech recognition

This day I'm using the speech recognition module with Arduino UNO.

My wife has brought me this Arduino Module as my birthday gift. I'll show you how it can be used.


It can be connected to Arduino or to any other Microcontroller through serial port.

It can also be connected to the standard PC through its serial port but through a TTL converter. Since a standard PC serial port sends and receives RS232 signals (+12v and -12 v) but this module handles TTL signals ( 0 and +5 v )


You can control this module through HEX Format commands or through Arduino libraries associated with it.


First, I had to configure it using USB port in my laptop through this FOCA circuit which converts USB signals to TTL signals.


Then I could use Arduino libraries to initialize the module and load it with speech commands.

The module can store up to 80 voice commands. Then it can differentiate between each one and send signals to Arduino upon command recognition.

Friday, December 8, 2017

PS2 Keyboard Bluetooth interface to Android Smartphone

Do you like using the keyboard to record your thoughts and to code?

Have you ever thought of using the normal sized keyboard to type in your Android smartphone?

Can you make an Arduino project that connects your favorite keyboard with your smartphone via Bluetooth connection?

Today I came to the idea and loved it very much.

It's very simple to implement.

Using Arduino mini and HC-06 Bluetooth module and connect them to the PS2 keyboard.

You can then read text from keyboard and send it wirelessly to the smartphone.


Here is the PS2 Connection to Arduino and code for this project.

This project can be found on Arduino platform

https://playground.arduino.cc/Main/PS2Keyboard


And here is the connection for it.


Note:

Make sure you connect the Clock PIN to the digital PIN 3 on the Arduino. Otherwise the interrupt, and therefore the whole library, won't work.

In this project, we used the The PS2Keyboard library.

Usage:

This is sample code;

#include

#define DATA_PIN 4
PS2Keyboard keyboard;

void setup() {
  keyboard.begin(DATA_PIN);

  Serial.begin(9600);
  Serial.println("hi");
  delay(1000);
}

void loop() {
  if(keyboard.available()) {
    byte dat = keyboard.read();
    byte val = dat - '0';

    if(val >= 0 && val <= 9) {
      Serial.print(val, DEC);
    } else if(dat == PS2_KC_ENTER) {
      Serial.println();
    } else if(dat == PS2_KC_ESC) {
      Serial.println("[ESC]");
    } 
  }

}


HC-06 Bluetooth Module to Arduino Mini Connection


HC-06ARDUINO
VCC->+3.3V
GND->GND
TX->2
RX->3


 HC-06 ----- Arduino


VCC   ---   3.3v 


 GND --- GND 


TXD   ---   RXD 


RXD   ---   TXD


Now we can add the stuff together to make our complete project.

PS2 Keyboard

Adruino Mini Pro

HC-06 Bluetooth Module

3.7V Li-Poly Battery

Android Smartphone

Android App : Arduino Bluetooth Control
Arduino Bluetooth Control App


Cover art


Tank