

Hello and welcome in this episode we're gonna study how to replicate Arduino in ATtiny85 Microcontroller many cases you need to use your Arduino as a standalone project and you need to use this Arduino board inside the project that you have to make it permanent.

Not just start playing with it and try some prototyping then disassemble no you need to make it to make it useful and reliable and permanent so you are giving away your Arduino board and you're not using it but that's a waste.
Because Arduino board includes programmer and it's actually a prototyping tool so why not use the main Microcontroller itself and sometimes you need just only some few pins and limited memory size that you don't need all Microcontroller.
Build Your Own Arduino Board Using ATtiny85 Microcontroller
So here is how we are using Arduino to clone it and make new Arduino.

Let's start by making Arduino compatible with ATtiny by making File --> Preferences we add here Arduino we paste it right here then we go to board manager go to ATtiny install installation complete clothes tools we choose ATtiny board now we have ATtiny support inside Arduino IDE choose a site on ATtiny85 and choose the internal Eight megahertz oscillator okay that's how we started to make ATtiny support on Arduino IDE.


So let's get started on programming ATtiny
First we need to load Arduino ISP example but on our Arduino UNO board.


So this Arduino UNO is gonna be our Arduino ISP programmer that will program bootloader and Arduino code inside ATtiny Microcontroller and we click upload on Arduino UNO.
Then we close this one and we start by making our circuit we connect our circuit this connection.


I've read warning that you need to put capacitor between reset and ground on your Arduino UNO programmer so that you don't hurt the bootloader I didn't want to hurt or overwrite my bootloader from Arduino UNO Board so I put the capacitor.

Then I connected all the stuff and I had this error error while burning bootloader I had bad connection.

So I started again then we need to program ATtiny board select ATtiny processor at the ATtiny85 and turn on 8 megahertz and use the programmer Arduino as ISP then we press Burn bootloader.


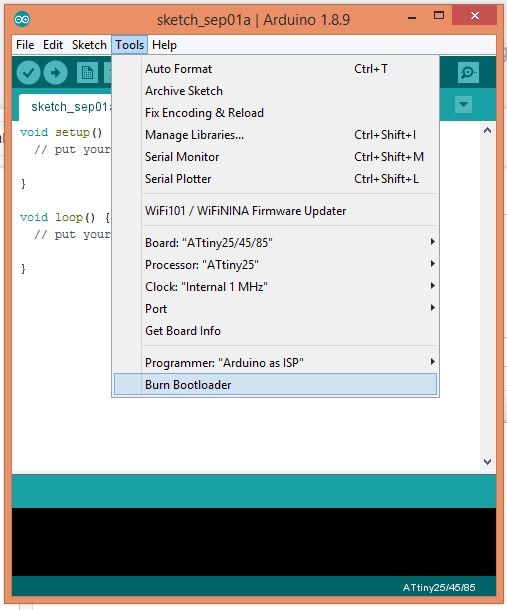
Then I check I found done burning bootloader it worked perfect.

Now we are ready to upload any program on Arduino this time on ATtiny so we opened the basic blink example and we checked that ATtiny board processor and programmer Arduino as ISP but we need to change some values.
For example, LED_BuiltIn we'll change it to pin number zero and this one and this one verified for Arduino ATtiny.
Now we are done compiling so we upload it.


Then we are done compiling now we try to run that blink program on Arduino ATtiny this is the ATtiny Microcontroller running the blink program that's all I hope you like it thank you please click like share and subscribe.
Read on my Website:
No comments:
Post a Comment